

Introduction
Timelapse photography is a magical technique that reveals the passage of time in fast-forward. But to make the final result smooth and pleasant to watch, your images may need to be properly aligned with each other — and that’s not always easy!
Depending on how the photos were taken, there are different ways to fix small shifts. Here’s a simple guide to help you understand when and how to align your images.
Case 1: Camera on a tripod, but it’s windy
What happens:
The wind causes slight movements in the camera, resulting in small shifts between frames.
What to fix:
Adjust the horizontal and vertical position of the images (left/right, up/down).
Case 2: You’re holding the camera by hand
What happens:
Even with a steady hand, there’s always a bit of movement — and sometimes a slight tilt.
What to fix:
Correct the position (like in case 1: left/right, up/down) and also the angle of the image (as if rotating it slightly).
Case 3: You move closer or farther from the subject
What happens:
Objects in the frame appear larger or smaller depending on your distance.
What to fix:
In addition to position and angle, you’ll need to adjust the scale of the image to match the others.
Case 4: You tilt the camera up or down, left or right
What happens:
The perspective changes, as if you’re viewing the scene from a different angle.
What to fix:
In addition to position, angle and scale, you’ll need to reproject the image — that means correcting the perspective so it matches the others.
Why Choosing the Right Alignment Case Matters
Each situation — whether it’s wind, handheld shooting, changing distance, or shifting angles — causes different types of misalignment. And each type requires a specific correction method.
If you apply the wrong fix:
- You could introduce new distortions by overcorrecting or misaligning the image further.
- The final timelapse might still look unstable or inconsistent.
How to Align Photos in Futura Time Lapse
Futura Time Lapse is designed to make photo alignment simple and automatic, especially for timelapse sequences affected by wind, handheld shooting, or perspective shifts.
1. Install the Software
Download the free version of Futura Time Lapse for Windows 10 or 11 from Camera Futura’s website.
2. Prepare Your Folders
- Create a source folder with all your original timelapse images (JPEG format).
- Create a destination folder where the aligned images will be saved.
3. Launch the App
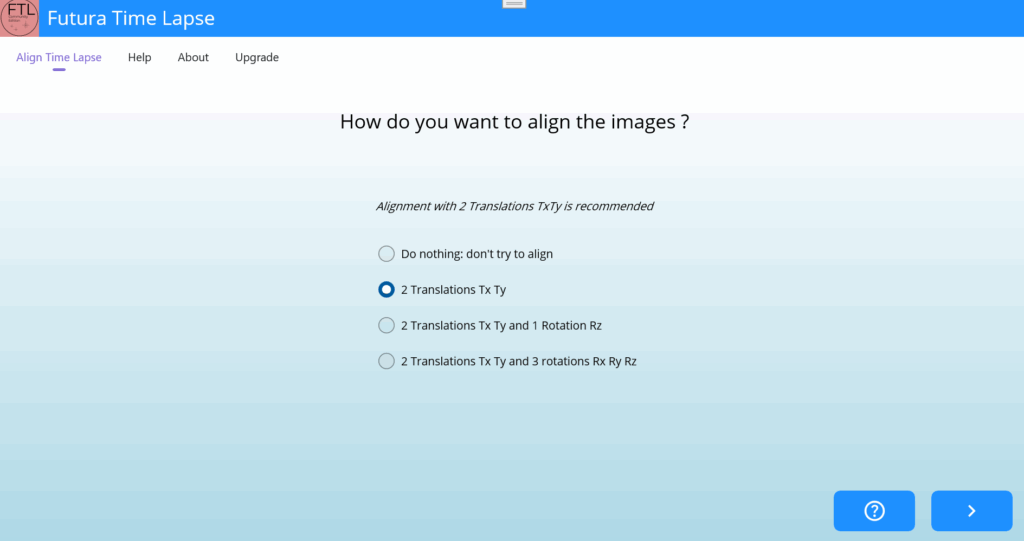
Open Futura Time Lapse and select:
- The source folder containing your images.
- The destination folder for the aligned output.
4. Choose Alignment Settings (Optional)
- For basic use, just click Start — the app will automatically detect and correct misalignments.
- For advanced users, you can:
- Choose which parts of the image to use for alignment.
- Select different projection methods depending on the type of distortion (e.g., perspective, rotation, scale).
5. Start the Alignment
Click Start and let the software process the images. This may take a few minutes depending on the number of photos.
6. Generate the Timelapse Video (Optional)
Once the images are aligned, you can use the built-in feature to create a video directly from the aligned sequence.
Why This Matters
Futura Time Lapse helps you avoid:
- Shaky or unstable timelapse videos.
- Manual editing in complex software.
- Technical guesswork — the app handles alignment intelligently.
It’s especially useful for:
- Windy tripod shots
- Handheld sequences
- Long-range timelapses with telephoto lenses
- Perspective shifts due to camera movement