
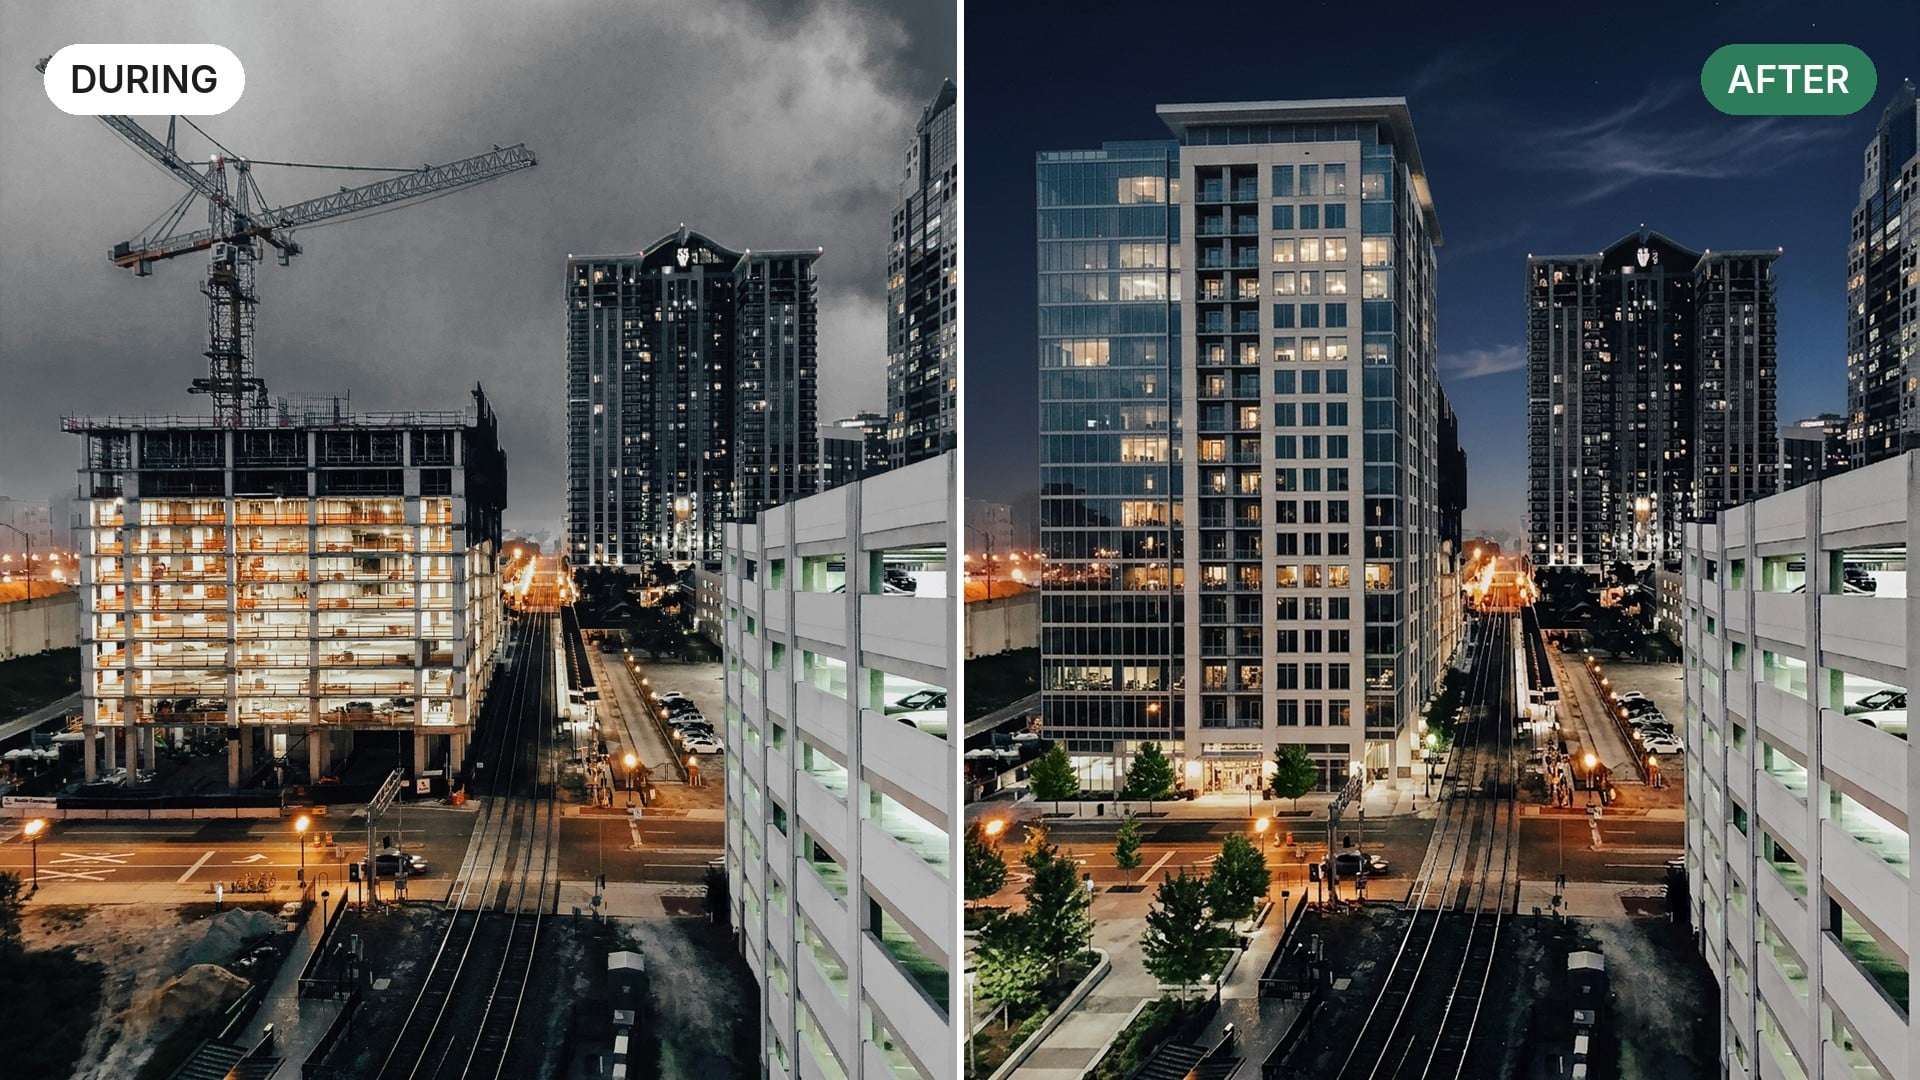
A word of transparency. This article is published by Camera Futura, the maker of Futura Time Lapse, so we can’t claim to be impartial. We have tried to be fair anyway, starting from a simple idea: no application can do everything well, so it makes sense to use each one for what it does best. Video editors are excellent at stabilizing video. This article is about the one case where they struggle: time-lapses made from photos.
Video stabilizers are built for footage where each frame is a fraction of a second away from the last. A photo time-lapse breaks that premise: frames are minutes, hours or months apart, the light changes, and the scene itself changes. That is why running a time-lapse through a video stabilizer so often leaves it shaky, warped or heavily cropped.
It is a very common assumption. You shoot a few hundred photos of a building site, a garden or the night sky, the result jitters, and the natural reflex is to drop the sequence into Premiere Pro, After Effects, DaVinci Resolve or Final Cut and click “Stabilize”. Sometimes it looks almost right. More often it doesn’t, and it is hard to tell why.
This article explains what video stabilization really does, why photo time-lapses defeat it, and what the right approach is: aligning every photo to a common reference before the video is ever created.
How video stabilizers actually work
A video stabilizer estimates camera motion from one frame to the next, then smooths that motion out. The details vary by tool, but the pipeline is broadly the same:
- Track features between consecutive frames. The software finds distinctive points (corners, edges, texture) and follows them from frame N to frame N+1.
- Build a camera path. Chaining those small frame-to-frame movements gives an estimated trajectory of the camera over the whole clip.
- Smooth the path. The jittery trajectory is replaced by a smoother one. Some tools offer a “no motion” or “camera lock” mode that tries to flatten it completely.
- Warp and crop. Each frame is shifted, rotated or warped toward the smoothed path, then the image is cropped or zoomed to hide the moving black borders.
Every step relies on one silent assumption: consecutive frames look almost the same. At 25 or 30 frames per second, that is true. Objects move a few pixels, the light is identical, and the same features are visible in frame after frame. Video stabilization is excellent at exactly this job.
Why photo time-lapses break every assumption
A photo time-lapse is not “video, only slower”. It is a set of independent photographs, and nearly everything a stabilizer relies on is missing.
| Video clip | Photo time-lapse | |
|---|---|---|
| Time between frames | 1/25 to 1/60 s | Seconds to days, sometimes weeks |
| Lighting between frames | Practically identical | Sun, clouds, night, seasons, artificial light |
| Scene content | Stable | Changes by design (a building rises, a plant grows) |
| Camera motion | Continuous and small | Sudden jumps: a bump, wind, a battery swap, a remount |
| What each frame shows | A continuous moment | An independent moment in time |
The time gap kills feature tracking. Between two shots taken an hour apart, shadows have moved, clouds have changed and people have gone. The points a stabilizer tracks are either gone or no longer where they should be. On a long-term construction time-lapse, the very things in the foreground (scaffolding, cranes, new floors) are what changes most.
The longer the project, the harder it gets. Take a building site photographed once a day for two years. Between two consecutive photos, the weather, the light and the shadows have changed, vehicles have come and gone, and whole parts of the scene have been built or demolished. Foggy, rainy or snowy days add frames with very few usable details. The further the project goes, the less two frames have in common.
Lighting changes look like motion. A shadow sweeping across a facade, or a sunrise brightening one side of the frame, shifts the features a tracker latches onto. The stabilizer reads that as camera movement and “corrects” it, adding wobble that was never there.
Moving subjects pull the result. Clouds, cranes, traffic and crowds cover large parts of many time-lapse frames. If the tracker locks onto them, it aligns the frame to the clouds instead of to the ground.
Errors accumulate. A stabilizer chains small frame-to-frame estimates. In video, each estimate is tiny and precise. In a time-lapse, each estimate is noisy, and hundreds of noisy steps add up to a slow drift: the horizon creeps, the image slowly rotates or zooms.
Smoothing is the wrong goal. A stabilizer is designed to keep intentional camera movement and remove only the shake. A fixed-camera time-lapse has no intentional movement: you want every frame locked to the same position, to the pixel. Even “lock” modes still depend on frame-to-frame tracking, so they inherit all the problems above.
Sudden jumps are treated as camera moves. When the camera is bumped or remounted after a battery change, the whole view jumps by a few dozen pixels. A video stabilizer often interprets this as a deliberate pan and smooths it into a slow slide over several seconds instead of removing it.
The video is already a degraded copy. To stabilize in a video editor, the photos are usually first turned into a video file. The stabilizer then works on compressed, often downscaled frames rather than on the original high-resolution photos, and the stabilized result is compressed again.
Gyro-based stabilizers don’t apply at all. Some of the best stabilizers, such as ReelSteady and Gyroflow, don’t analyse the image: they use the motion data recorded by the camera’s gyroscope while it films. A series of photos has no continuous motion record to work from, so this family of tools is simply out of the game.
Symptoms you’ll recognize
If you have tried stabilizing a photo time-lapse in a video editor, you have probably seen at least one of these:
- Residual jitter. The worst jumps are softened, but the image still trembles from frame to frame.
- Wobble or “jelly” effect. Buildings bend and walls breathe, because the tool applied local warping to compensate for motion that was really light or content changing.
- Slow drift. The horizon gradually tilts, or the framing slides to one side over the course of the clip.
- Heavy crop and zoom. To hide moving borders, the tool crops deep into the image, losing resolution and part of the composition.
- “Floating” jumps. A camera bump turns into a slow, unnatural glide across several seconds.
- Unpredictable results. Re-running the same clip with slightly different settings gives a completely different output, and long sequences may fail to analyze at all.
Registration, not stabilization: what photo time-lapses need
A photo time-lapse doesn’t need its motion smoothed. It needs every photo registered: brought into exactly the same frame as one chosen reference photo. This is the approach used in astronomy, microscopy and remote sensing, where images taken at different times must be compared pixel to pixel.
In short, the two approaches deal with camera motion at different stages. Video stabilization works as photos → video → stabilization. Alignment works as photos → alignment → video.
| Frame-to-frame video stabilization | Registration to a reference | |
|---|---|---|
| Each frame is compared with | Its neighbours in the clip | Other photos, and in the end one reference photo |
| Goal | A smooth camera path | No camera motion at all |
| Small errors | Add up over the clip (drift) | Can be checked directly against the reference |
| Sudden jump (bump, remount) | Smoothed into a slow glide | Corrected on the photos concerned |
| Works on | A video file, often compressed | The original photos |
| Output | A stabilized video | Aligned photos, then a video if you want one |
Good registration for time-lapses also has to:
- Use a geometric model that matches the real problem. A camera that only slid needs a shift; a tripod that twisted needs rotation too; a camera remounted at a slightly different angle needs a perspective correction. A more complex model than necessary can introduce distortions, so the choice matters.
- Ignore what changes. Lighting, weather, moving objects and the progress of the scene itself must not be mistaken for camera movement.
- Keep the photos. Aligned stills can be graded, deflickered, retouched or used on their own (before/after comparisons, reports, prints) before any video is rendered.
Not every part of the image is a good anchor. Reliable alignment depends on what should not move:
- Reliable: buildings, bridges, mountains, rock formations, roads and other infrastructure.
- Unreliable: clouds, trees and vegetation, water, vehicles, people and, on a building site, cranes, scaffolding and the structure being built.
In construction and landscape time-lapses, the static structures carry most of the useful alignment information.
How Futura Time Lapse 4.0 does it
Futura Time Lapse 4.0 does not simply compare every photo with the first one. Its alignment engine analyses the whole sequence before deciding how to align it. In six steps:
- Sort and screen the photos. Photos are put in shooting order, using the EXIF date, or else the file name or file date. A quick check sets aside photos that are almost black, almost white, or lost in blur or fog, so they cannot break the sequence. The limits are deliberately cautious: very dark night shots still align well and are kept.
- Find stable details. In each photo, the engine looks for distinctive details that can be recognized from one photo to another, after reducing the effect of changing light. You can also tell the app which area to use, or which area to ignore, such as trees in the wind.
- Match each photo with several others, not just the previous one. Each photo is compared with several photos around it, so a single bad photo cannot break the sequence. A link is rejected if the movement it implies is implausible, or if the matching details are bunched on a small part of the image, typically a crane or a vehicle that moved.
- Keep the strongest links and choose the best reference. From all the links found, the engine keeps the most reliable ones. The reference is the best-connected photo, preferably near the middle of the sequence, rather than simply the first one.
- Check and correct drift. On long sequences, the engine checks that small errors have not added up, by comparing photos directly with the reference. If drift is found, it is corrected smoothly across the sequence, and the correction is kept only if it measurably improves the result. Each photo is then fine-tuned on the reference, relying on what does not move, such as buildings and ground, rather than clouds.
- Crop and render. The app computes the largest frame, in your chosen shape, that all aligned photos cover, centred on the reference framing. You can then adjust the framing and export a video in 1080p or 4K.
The three alignment methods set which corrections are allowed:
- Perspective (default): shift, rotation and zoom, plus a perspective correction only when the engine judges it safe (enough matching points, which agree with each other). For cameras remounted or re-aimed between shots.
- Straight: shift, rotation and uniform zoom, never any stretching. A good choice for distant landscapes.
- Shift only: the image can only move, never rotate or zoom. For a tripod that vibrates in the wind; long sequences then cannot build up a slow rotation or zoom.
Which method for which situation:
| Shooting situation | Typical camera movement | Method |
|---|---|---|
| Tripod vibrating in the wind | Small shifts | Shift only |
| Tripod bumped or nudged | Shift and rotation | Straight |
| Distant landscape, camera slightly moved | Shift, rotation, small zoom | Straight |
| Handheld shooting | Shift, rotation, change of perspective | Perspective |
| Camera removed and remounted between visits | Shift, rotation, scale, change of perspective | Perspective |
| Long-term construction project | A mix of all of the above | Perspective |
Photos that cannot be linked reliably are flagged rather than forced into place, and any photo can be adjusted by hand.
The typical uses are construction and civil engineering time-lapses, nature and garden sequences, astrophotography, and any project where the camera could not stay perfectly still. Futura Time Lapse runs on Windows and macOS, and a free Community Edition lets you test it on your own sequence.
When video stabilization is the right tool
To be fair, video stabilizers are not useless for time-lapses. They work well when the frames behave like video:
- Short intervals in stable light. Shots taken every one or two seconds over a few minutes, such as traffic or a crowd, often stabilize fine.
- Hyperlapses and motion time-lapses. When the camera moves on purpose (walking, a slider, a drone), you want that movement smoothed, not removed. That is a stabilizer’s job.
- Final touch-up. After registration, a light stabilization pass can still be used for creative smoothing, on a sequence that is already clean.
The rule of thumb: if the camera is meant to stand still and the photos are far apart in time, align the photos first. If the camera is meant to move, stabilize the video.
Dedicated alignment tools don’t exist because video stabilizers are poor. They exist because a series of photos and a video clip are different inputs. Neither approach is better in general: they solve different problems.
Practical tips for a steady photo time-lapse
Alignment software fixes a lot, but a good capture makes its job easier:
- Mount the camera as rigidly as you can. Avoid long arms and light tripods exposed to wind.
- Mark the position. If the camera has to be removed (battery, card, maintenance), mark its exact position so you can put it back as closely as possible.
- Lock focal length and focus. A zoom that creeps or autofocus that hunts changes the image scale, which is harder to correct than a shift.
- Keep stable reference areas in frame. Buildings, rocks or the horizon give the alignment solid anchors; a frame filled with sky or foliage gives it very little.
- Align first, then grade and render. Do registration on the original photos, then deflicker, color-grade and export the video.
Conclusion
Video stabilization and photo time-lapse alignment look like the same problem, but they are not. A stabilizer smooths motion between neighboring frames of a continuous video. A photo time-lapse needs each independent photo locked onto a fixed reference, despite hours or months of changing light and scenery.
That is the gap Futura Time Lapse fills. If your time-lapse still shakes after a pass through your video editor, try aligning the photos themselves: download the free Community Edition and run it on your own sequence.
See also: Aligning photos for a time-lapse: 6 tools tested on 5 different cases.
FAQ
Can Premiere Pro’s Warp Stabilizer fix a photo time-lapse?
Sometimes, on short sequences shot at short intervals in stable light. On long sequences with changing light or a changing scene, it tends to leave jitter, wobble or drift, because it tracks motion between consecutive frames rather than aligning each photo to a fixed reference.
Does DaVinci Resolve’s camera lock mode solve the problem?
It removes more motion than smoothing modes do, but it still relies on frame-to-frame tracking. Large time gaps, lighting changes and moving subjects affect it the same way.
Why does my time-lapse drift or tilt after stabilization?
Small tracking errors between each pair of frames add up over hundreds of frames. Measuring photos directly against one reference photo reveals that drift, so it can be removed.
Should I align before or after deflickering?
Align first, on the original photos. Deflickering and color grading work best on frames that are already in the same position.
Can I use the aligned photos without making a video?
Yes. Aligned photos are useful for before/after comparisons, construction progress reports or prints.
Sources
- Adobe Premiere Pro: stabilize footage with Warp Stabilizer
- Adobe After Effects: adjust for shaky camerawork with Warp Stabilizer VFX
- Apple Final Cut Pro User Guide: correct shaky video
- Blackmagic Design: DaVinci Resolve Reference Manual (stabilization)
- Engadget: GoPro’s Player + ReelSteady app, stabilization from gyro data
- Oscar Liang: how to use Gyroflow, stabilization from gyro data
