
When the camera can’t stay put
A long-duration time-lapse rarely gets a camera bolted in place for months. The camera is needed elsewhere, the site isn’t secure, the weather is hostile, or there is simply nowhere to mount it.
So you take it home and come back next week. And that is where the trouble starts: putting the camera back in exactly the same spot, at exactly the same height and angle, is extremely hard. With fixed markers and a lot of patience it can be done, but it turns every visit into a chore.
There is a far more comfortable approach: accept that each shot will be slightly off, and align all the images afterwards.
Typical projects
- Civil engineering and construction. A bridge, a tunnel portal or a building can take months or years to complete. Visits happen weekly or monthly, and the camera rarely stays on site in between.
- Four-seasons landscapes. One view photographed across a whole year: snow, spring green, summer haze, autumn colours. The photographer comes back to the same viewpoint dozens of times.
- Outdoor plant growth. A tree in a garden, a vegetable patch or a field over a growing season. Leaving a camera outside for months is often impractical, so the shots are taken by hand on each visit.
Why not go handheld?
Once you accept that the images will be aligned afterwards, a question follows naturally: why bother with a tripod at all?
If the software corrects the small differences between visits, it can also correct the differences of a handheld shot. Stand in roughly the same place, frame roughly the same view, press the shutter. If you’re keeping it simple, you might as well keep it very simple.
Understanding alignment
Alignment works by finding the same details in two images and computing how to move one so it sits on top of the other. The more those images have in common, the better it works.
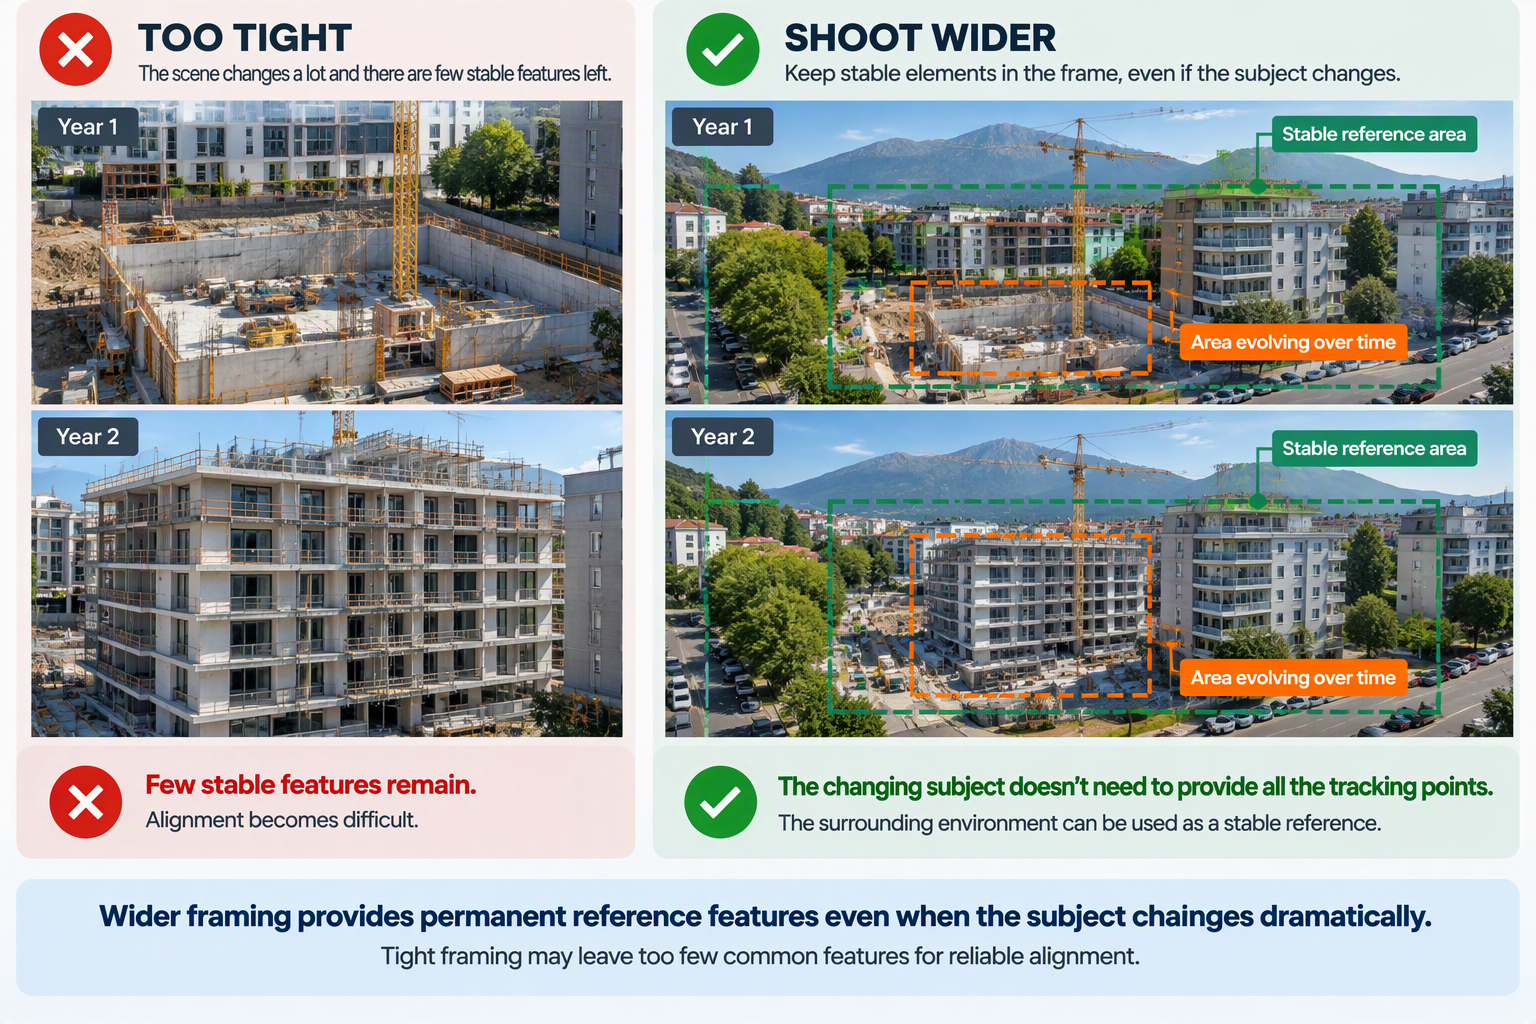
Don’t frame too tight. Leave some margin around your subject so that each shot includes stable elements: buildings, rocks, roads, the horizon. You will lose a little of the edges when cropping after alignment, so a wider frame gives you room to spare. We cover this in more detail in Months of Shooting to Create a Time-Lapse That Will Be Impossible to Align: The Classic Mistake (and How to Avoid It).
Know which movements you need to correct. Between two handheld shots, the camera moves in several ways:
- Horizontal and vertical shift (Tx, Ty): you stood a little to the side, or held the camera a little higher.
- Rotation (Rz): the camera was slightly tilted, so the horizon isn’t level from one shot to the next.
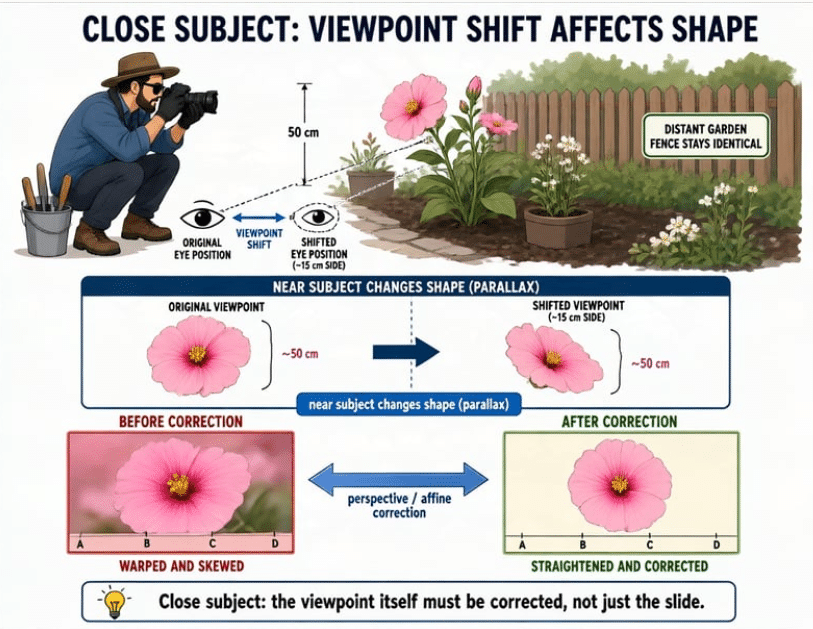
- Perspective: you changed your viewing angle, so the subject’s geometry itself changes.
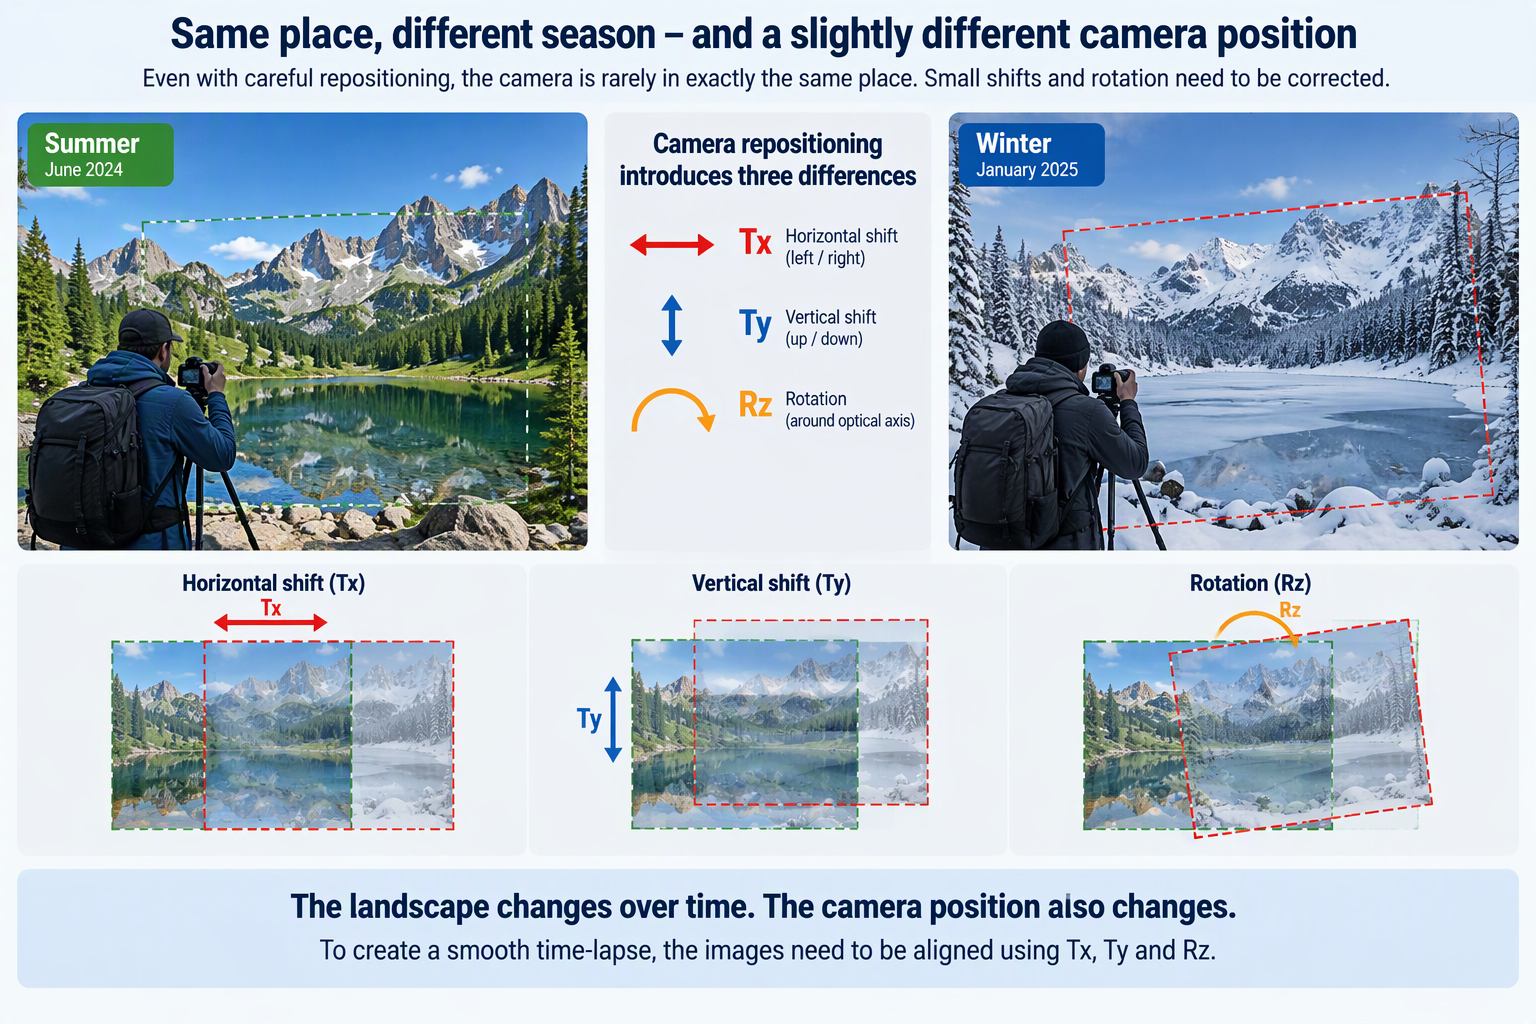
Shift plus rotation covers almost every case. Perspective correction is needed mostly for subjects shot at close range, where a step to the side changes the angle of view noticeably. For a distant landscape it is rarely necessary.
Doing it with Futura Time Lapse
Handheld long-term sequences are exactly the situation the new Futura Time Lapse was designed for. Between two visits weeks apart, almost everything can change: the light, the contrast, the colours, the season, even the shape of the subject itself as a structure rises or a tree fills out. Many alignment tools lose their footing when the images differ that much. The alignment algorithm in Futura Time Lapse 4.0 is built to find what stayed the same in the scene, even when lighting, contrast, colour or shapes have changed a lot.
The workflow is short:
- Drop your photos onto the app and choose a destination folder.
- Pick the alignment method. Start with Straight, which corrects shift and rotation. That covers most handheld sequences. If your subject was shot at close range and the angle of view changes from visit to visit, switch to Perspective.
- Check the result by scrolling through the aligned frames, then export your images or your video.
If you are unsure which method to choose, try Straight first: it is the more conservative correction and keeps straight lines straight. Use Perspective only when Straight leaves visible drift.
Conclusion
A long time-lapse doesn’t need a camera locked in place for months, or even a tripod. Shoot by hand on each visit, keep a generous frame with stable elements in it, and let the alignment do the rest.
Whether you are documenting a construction site, a landscape through the seasons or a garden over a summer, you only need to come back regularly. Download Futura Time Lapse and try it on your own sequence: the Community Edition is free on Windows and macOS.
